How To Troubleshoot Smart Sprinkler Watering While Raining?
It is frustrating to watch your sprinklers run in the middle of a rainstorm. Your lawn is already getting water, so why is the system still going?
This is a common problem with smart sprinkler systems, and the good news is that it is usually fixable without calling a professional.
The most likely cause is a rain sensor that is not working properly. It could be disabled, blocked, or wired incorrectly. Any one of these issues can trick your system into ignoring the rain completely.
In this guide, you will learn exactly how to troubleshoot a smart sprinkler that keeps watering while it rains. We will walk through checking your sensor settings, inspecting the wiring, looking for physical obstructions, and more.
In a Nutshell
Your rain sensor is the most common culprit. It may be set to bypass mode, blocked by debris, or wired incorrectly to the controller.
Check your settings first. Make sure the rain sensor feature is set to “active” and not accidentally switched to bypass.
Physical obstructions matter a lot. Tree branches, roof eaves, and debris can block the sensor from detecting rainfall properly.
Wiring problems can fool your system. If the receiver is not connected correctly to the controller, the sensor signal never gets through.
Inspect your sprinkler heads too. Clogs, breaks, or misalignment can cause unexpected watering behavior even when the sensor is working fine.
If basic troubleshooting does not fix the issue, a certified irrigation professional can inspect your system and identify deeper problems.
Why Your Smart Sprinkler Runs During Rain
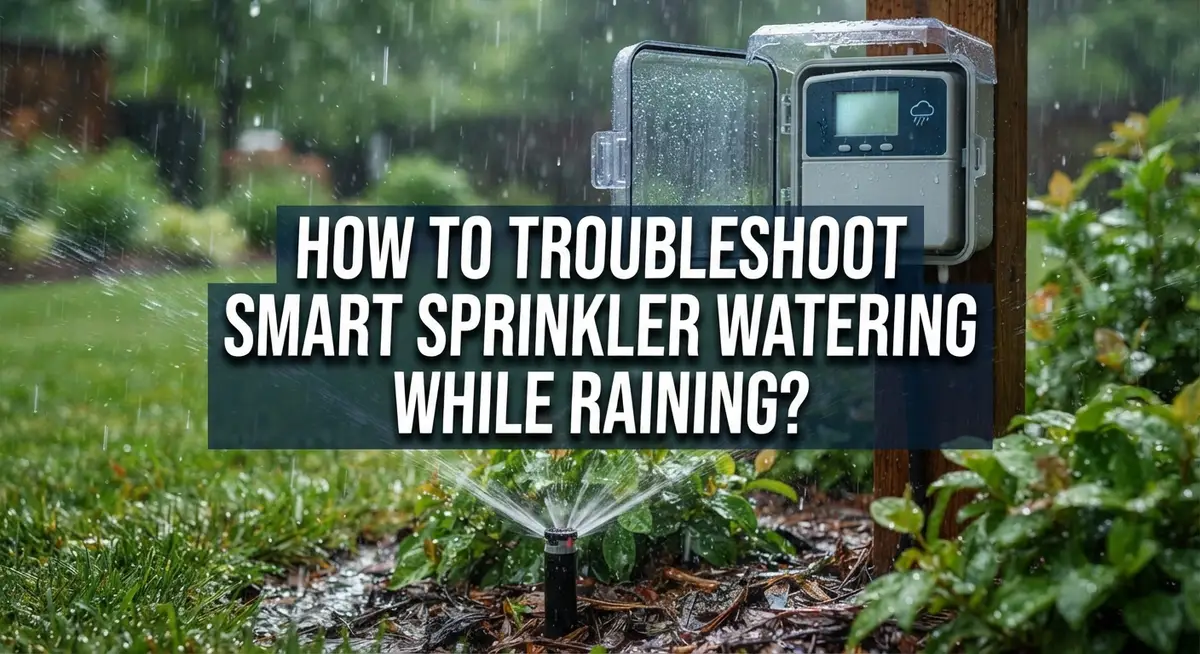
Your smart sprinkler runs during rain for a few clear reasons. The most common issue is a rain sensor that is disabled or blocked. This sensor tells your system to stop watering when it detects moisture from the sky.
The rain sensor feature might be accidentally set to bypass mode in your app or controller. When bypass is active, your system ignores rain signals completely. Check your settings right now to confirm the rain sensor is set to “active” and not “bypass.”
Physical obstructions prevent the sensor from working properly. Tree branches, roof eaves, and debris pile up on top of the sensor over time. When the sensor cannot see the rain, it cannot tell your system to pause watering.
Wiring problems also cause this issue. The receiver must connect correctly to your controller for the signal to work. If the wires are loose, disconnected, or plugged into the wrong terminals, your rain sensor becomes useless.
Your sprinkler heads themselves might be the problem too. Clogged nozzles or broken heads can spray water in unexpected directions. Misaligned heads might water sidewalks and driveways instead of just your lawn and garden.
Water pressure issues create runoff that wastes water. If your system waters too fast, the soil cannot absorb the moisture properly. This causes water to run off rather than soak in.
Start by checking your settings first. Verify the rain sensor is active and not bypassed. Then inspect the sensor location for any blockages. Clear away branches and debris from the sensor top. Finally, examine your wiring connections and sprinkler heads for damage or misalignment.
How Smart Sprinkler Rain Sensors Work
A rain sensor acts as the brain of your smart sprinkler system. It detects moisture in the air and tells your controller to stop watering. When it works properly, your system shuts down automatically during rainfall.
The sensor contains a small disc or cup made of absorbent material. This material swells when it gets wet. As it swells, it triggers a switch inside the sensor. That switch sends a signal to your sprinkler controller saying “stop watering now.”
Your controller receives this signal and pauses all scheduled watering zones. The system stays paused until the sensor dries out again. This process typically takes a few hours after rain stops.
The receiver is the part that connects your sensor to the main controller. It sits near your controller box and picks up the signal from the sensor. Think of it as a translator between the sensor and your system.
For the system to work, the sensor must be completely exposed to rainfall. It cannot sit under eaves, tree branches, or covered areas. Rain must fall directly on the sensor disc for it to activate properly.
The sensor also needs correct wiring to the receiver. Loose connections or reversed wires prevent signals from reaching your controller. A broken wire means your system never gets the “stop” message.
Your controller must also have the rain sensor feature turned on. Some systems allow you to bypass this feature. If someone switched it to bypass mode, your sprinklers will ignore the sensor completely and run during rain.
Understanding how these parts work together helps you identify problems faster. You can check each component systematically to find what is preventing your system from stopping during rainfall.
How To Check Your Rain Sensor Settings and Mode
Your rain sensor settings control whether your smart sprinkler stops watering during rainfall. You need to check two main things: the sensor mode and the physical connection between components.
First, open your sprinkler app or controller display. Look for a setting called “rain sensor mode” or “rain delay.” This setting should show “active” or “enabled.” If you see “bypass” or “disabled,” your sensor is turned off. Switch it back to active mode immediately. This is the most common mistake people make.
Next, verify the mode is set correctly in your physical controller too, not just the app. Some systems require you to confirm settings in both places. Check your system’s manual to see exactly where this setting appears on your device.
Now examine the wiring between your rain sensor and receiver unit. The receiver connects your sensor to the main controller. Look for loose cables or disconnected wires near both the sensor and receiver. A loose connection stops signals from reaching your controller, so your sprinkler keeps running even when it rains.
Check that your sensor sits fully exposed to rainfall. Move any branches, leaves, or roof overhangs away from the sensor top. The sensor needs clear access to rain to detect moisture properly.
If your settings show “active,” wiring looks secure, and the sensor is unobstructed, test your system manually. Some apps have a “test rain sensor” feature. Use this to confirm the signal travels from sensor to controller correctly.
Still having problems? Your receiver might have failed. A professional irrigation technician can test whether the receiver needs replacement or if another component is causing the issue.
How To Inspect Rain Sensor Placement and Obstructions
Your rain sensor’s location matters more than you might think. A sensor placed in the wrong spot won’t detect rainfall properly, even if it’s working perfectly.
Start by walking outside to find your rain sensor. It’s usually a small cylindrical or disc shaped device mounted on a pole, roof edge, or wall. Look up and around it carefully. Check if tree branches, roof eaves, gutters, or leaves block the top surface. The sensor needs clear sky exposure to catch rainwater.
Move any vegetation away from the sensor. Trim back tree branches that hang over it. Clear away leaves and debris that collect on top. Even a thin layer of dirt can prevent water from reaching the sensor’s surface.
Next, examine what’s above the sensor. Roof overhangs, pergolas, or covered structures nearby can create rain shadows. The sensor sits in a dry spot even when it’s raining elsewhere in your yard. Reposition the sensor to an open area if possible.
Check the mounting height too. Your sensor should sit at least several feet away from walls and structures. This gives it a clear view of the sky and prevents wind from blowing rain sideways onto nearby objects instead.
Inspect the wiring path from your sensor to the receiver unit. Make sure no cables hang in puddles or get pinched by debris. Water damage or loose connections interrupt the signal between sensor and controller.
After clearing obstructions, test your system. Run a manual cycle and watch if the sensor stops watering when you spray it with a hose. This confirms the sensor now has proper exposure and can detect moisture correctly.
How To Verify Rain Sensor Wiring and Controller Connection
Your rain sensor wiring connects the sensor to your controller through a receiver unit. This connection must be secure and correct for your system to work properly. Let’s walk through how to verify everything is connected the right way.
Start by locating your receiver unit. This small box typically sits near your main controller or inside a weatherproof cabinet. Check that all wires running from your rain sensor to the receiver are firmly attached. Look for loose terminals or corroded connections that might prevent signals from reaching your controller.
Next, inspect the actual wire condition. Wires exposed to outdoor weather can crack, fray, or develop breaks over time. Run your fingers along the entire wire path from sensor to receiver. Look for visible damage, cuts, or areas where the wire covering has worn away.
Now examine the receiver terminals themselves. These connection points should be clean and tight. If you see green or white corrosion buildup on the terminals, this blocks electrical signals. Gently clean corroded terminals with a dry cloth or soft brush to restore proper contact.
Verify the wiring configuration matches your controller’s manual. Most systems use specific wire colors for positive and negative connections. Reversed wires prevent your rain sensor from communicating with the controller, making it seem like the sensor is broken.
After checking all physical connections, test your system by running a manual cycle. Watch whether your sprinklers stop when you manually trigger the rain sensor. If they don’t respond, the wiring issue likely needs professional attention. A certified irrigation specialist can test electrical continuity and identify breaks you cannot see.
How To Inspect Sprinkler Heads for Clogs and Misalignment
Sprinkler heads often cause watering problems even when your rain sensor works correctly. Clogged or misaligned heads waste water and create uneven coverage. Start by turning off your system completely before inspecting anything.
Walk around your yard and look at each sprinkler head carefully. Press gently on the pop up mechanism to see if it moves freely. A stuck head won’t retract properly and may spray in wrong directions. Check if water flows from the nozzle opening when you manually activate the system.
Look inside each head for debris. Dirt, sand, and sediment block water flow. Remove the nozzle cap if possible and rinse it under clean water. Use a small brush or cloth to wipe away buildup. Don’t use sharp tools that might damage the internal components.
Examine the spray pattern next. Sprinkler heads should water your lawn, not sidewalks or driveways. Misaligned heads waste water and create runoff. Gently adjust the head direction by hand if your system allows it. Some models have adjustment screws you can turn with a flat screwdriver.
Check for cracks or breaks in the plastic housing. Damaged heads leak water at the base and reduce pressure throughout that zone. These heads need replacement to restore proper function.
Pay special attention to heads near trees and structures. Debris collects more easily in these areas. Blocked heads often cause your system to activate during rain because water pressure drops, confusing your sensor readings.
After inspecting all heads, run a test cycle. Watch each head spray to confirm proper coverage. This simple inspection often solves watering problems without needing professional help.
Common Mistakes That Cause Sprinklers To Ignore Rain
Many people accidentally disable their rain sensor without realizing it. Your system has a mode called “bypass” that turns off rain detection completely. When this mode activates, your sprinklers water regardless of rainfall. Check your app or physical controller right now to confirm the rain sensor setting reads “active” instead of “bypass.”
Another common mistake involves blocking the sensor unintentionally. Rain sensors need direct access to falling water. Tree branches, roof eaves, gutters, and even leaves can obstruct the sensor. Your sensor cannot detect rain if something covers it. Walk outside and look at your sensor’s top surface carefully.
Incorrect wiring causes many rain sensor failures. The wire connecting your sensor to the receiver unit must be secure at both ends. Loose connections mean your sensor sends no signal to stop watering. Check that wires sit firmly in their terminals. Verify the wire colors match your controller’s manual specifications.
Some people set watering schedules too aggressively. Rapid watering causes runoff before soil absorbs water. Your grass needs moisture, not flooding. Space out your watering times and reduce duration instead.
Receiver units can fail over time. This device translates signals from your rain sensor to your controller. A broken receiver ignores rain sensor signals completely. If your settings look correct and wiring appears secure, the receiver might need replacement.
Test your system manually after checking each item. Run one zone for two minutes to see if water flows properly. This simple step reveals whether your sprinkler heads work and your sensor responds correctly. Document any problems you notice during testing.
When To Call a Certified Irrigation Professional
If you’ve completed all the basic checks and your sprinkler still runs during rain, it’s time to call a professional. Certified irrigation professionals have the tools and experience to diagnose problems you can’t fix alone.
Your rain sensor might have an internal failure. These devices contain electronic components that wear out over time. A professional can test the sensor’s electrical resistance and determine if replacement is necessary. They’ll use specialized equipment to measure whether the sensor responds to moisture correctly.
The receiver unit connecting your sensor to the controller could also be faulty. Professionals can isolate this component and test it independently. They know which diagnostic steps reveal hidden wiring problems or loose connections inside the receiver housing.
System calibration issues sometimes require professional adjustment. Your controller might have settings that override the rain sensor during certain times. A certified technician understands your specific controller model and can access menus you might not know exist.
Water pressure problems can also cause improper watering during rain. Professionals measure your system’s PSI (pounds per square inch) and adjust it to manufacturer specifications. Incorrect pressure makes sprinklers spray in patterns that don’t match your yard layout.
Professionals also inspect your entire system for issues beyond the rain sensor. They check valve operation, zone timing, and underground line integrity. These problems often hide until someone with proper training looks for them.
Call a certified irrigation professional if troubleshooting takes more than an hour or if you’re uncomfortable working with electrical connections. Most professionals offer diagnostic visits where they identify all problems at once. This saves you time and prevents water waste from ongoing system failures.
Final Thoughts
Fixing a smart sprinkler that runs during rain is completely manageable with the right approach. You now have a clear path to follow from checking settings to inspecting physical components.
Start with the simplest fix first. Check if your rain sensor is set to bypass mode. This single mistake causes most rain-related watering problems.
Move on to physical checks next. Look at where your sensor is mounted and make sure nothing blocks it from receiving rainfall. Eaves, tree branches, and debris are the most common culprits.
Wiring connections matter just as much as sensor placement. A loose or incorrect wire between your receiver and controller can make your system ignore rain data entirely.
Don’t forget your sprinkler heads. Clogs, cracks, and misalignment can cause watering problems that look like sensor failures but are actually mechanical issues.
Running a manual test cycle after each fix helps you confirm progress. You’ll know immediately whether your adjustments made a difference.
Keep your watering schedule reasonable. Aggressive schedules cause runoff and waste water even when your sensor works perfectly.
Document what you find during each inspection. Writing down wiring colors, sensor settings, and head conditions helps you track changes and spot patterns over time.
If basic troubleshooting doesn’t solve the problem, a certified irrigation professional can diagnose internal sensor failures and system calibration issues quickly.
Smart sprinkler systems are designed to save water, but they only work well when all components function together correctly. Regular checks keep your system running efficiently through every season.
Stay consistent with maintenance and your system will protect your lawn without wasting a single drop.
Frequently Asked Questions
Why does my smart sprinkler run even when it’s raining outside?
Your rain sensor is likely disabled or blocked from detecting moisture. The sensor sits on your roof or in an open area to catch rainfall. If it can’t sense water, your controller doesn’t know to skip watering.
Check your app or control panel. Look for a setting labeled “rain sensor” or “weather skip.” Make sure it shows “active” or “enabled,” not “bypass” or “off.” Bypass mode tells your system to ignore rain completely.
How do I know if my rain sensor is actually working?
First, verify the sensor sits in an open spot with no obstructions. Trees, eaves, gutters, or debris can block rainfall from reaching it. Clear away any branches or objects covering the top.
Next, check the wiring between your sensor and receiver unit. Loose or corroded wires prevent signals from reaching your controller. Push connectors firmly into place. If you see green corrosion, gently clean the connection with a dry cloth.
What should I check on my sprinkler heads during rain?
Inspect each head for clogs, cracks, or misalignment. Broken heads spray water in wrong directions and waste water. Clogged nozzles reduce water flow.
Also verify your heads aren’t pointing at sidewalks, driveways, or patios. Sprinklers should water only lawn and garden areas. Heads spraying hard surfaces don’t help your landscape and waste water.
Can my watering schedule cause sprinklers to run during rain?
Yes. If you set your schedule to run at a specific time regardless of conditions, it may activate during rainfall. Smart systems should include a “rain skip” feature that cancels watering when moisture is detected.
Check your scheduling settings. Make sure rain sensor adjustments are linked to your watering program. Some systems let you set a rain threshold. This determines how much rainfall triggers a skip.

Hi, I’m Yuri — I’m a tech enthusiast who loves breaking down complex gadgets, software, and tools into simple, honest reviews and guides. My goal? To help you spend less time researching and more time enjoying the right tech.