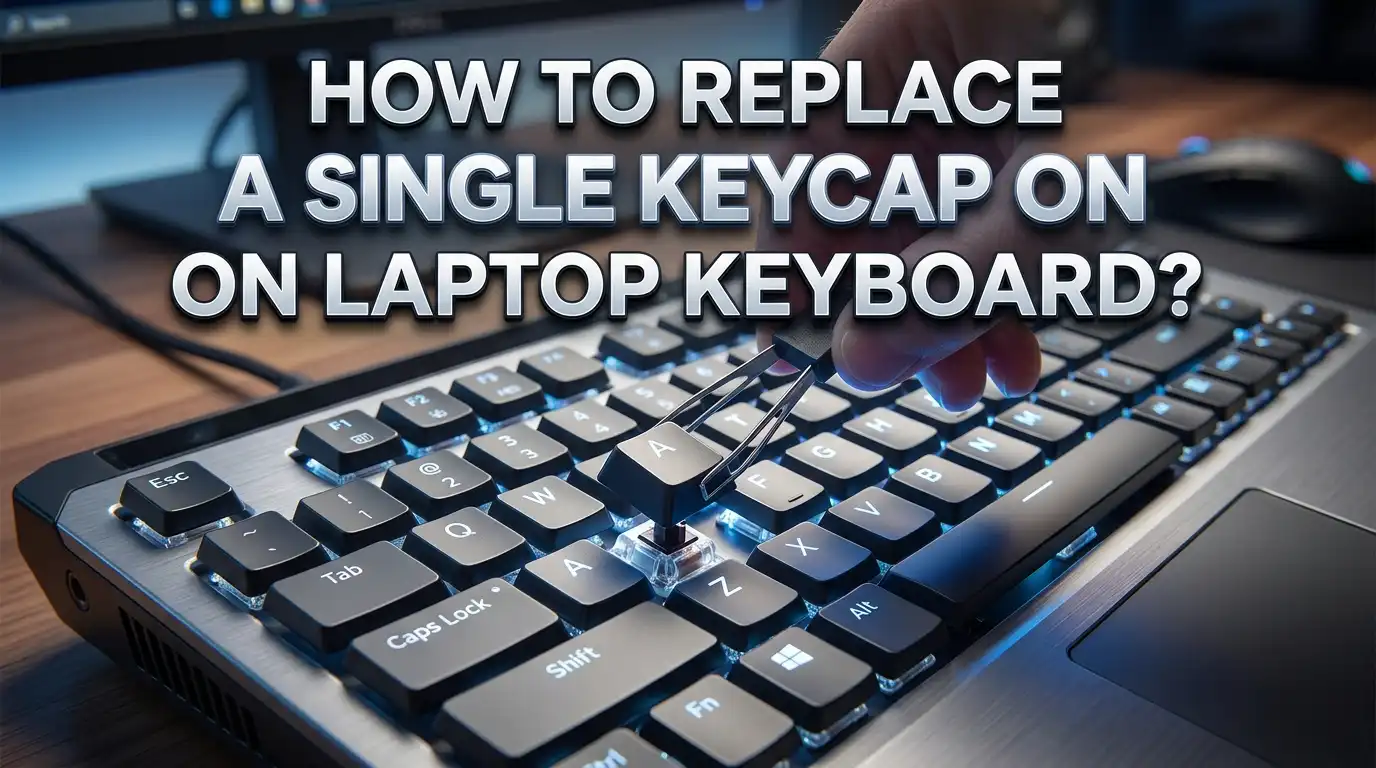
How To Replace A Single Keycap On A Laptop Keyboard
Has one key on your laptop keyboard stopped working, fallen off, or cracked? You do not need to buy a new laptop or pay for an expensive repair shop visit. Replacing a single keycap on a laptop keyboard is something most people can do at home in under 10 minutes.
This guide walks you through everything: understanding your keyboard type, gathering the right tools, safely removing the broken keycap, inspecting the parts underneath, installing the new key, and making sure it works perfectly.
By the end of this post, you will know exactly how to fix that broken key confidently and correctly without causing more damage. Let’s get into it.
Key Takeaways
- Know your keyboard mechanism first. Most laptops use either a scissor switch or a butterfly switch mechanism. Identifying your type before starting saves time and prevents damage.
- All laptop keys have three main parts: the keycap (the plastic piece with the letter or symbol), the retainer/hinge clip (the scissor-like plastic bracket underneath), and the rubber cup or dome (the small rubber piece that gives the key its bounce). All three parts can be replaced individually or as a kit.
- Always power off your laptop before doing any keycap work. This protects both you and the keyboard membrane from accidental input or electrical damage.
- Use the correct model number when ordering a replacement. Keycaps are NOT universal. A key from a Dell Inspiron 15 will not fit a Dell XPS 13. Always identify your exact laptop model before purchasing a replacement kit.
- Plastic pry tools or your fingernail are the safest removal tools. Metal tools like screwdrivers or metal spudgers can scratch the keyboard surface, snap the retainer clip, or damage the membrane beneath the key.
- If the key still does not register after replacement, the issue is with the membrane layer, not the keycap. In that case, a full keyboard replacement is needed, which is a job best done at a repair shop or by following a full keyboard disassembly guide.
Understanding What a Laptop Keycap Actually Is
Before you start pulling keys off your laptop, it helps to understand what you are actually dealing with. A laptop keycap is not just a plastic button sitting on a flat surface. It is part of a layered system that works together to register your keystrokes.
Every laptop key has three components. The first is the keycap itself, which is the top plastic piece stamped with a letter, number, or symbol. This is the piece you press with your finger every time you type. It snaps onto the mechanism below it and is the part most likely to crack, fade, or pop off.
The second part is the retainer clip, also called the hinge clip or scissor clip. This is a small plastic bracket shaped like an X or scissors. It sits directly under the keycap and is responsible for the up-and-down travel of the key. When you press a key and it springs back up, that is the retainer clip doing its job.
The third part is the rubber cup, also called a rubber dome or silicone cup. This tiny rubber piece sits in the center of the retainer clip area and sits directly over the keyboard membrane contact point. It provides the springiness of the key and triggers the electrical signal when you press down.
When a key “falls off,” it usually means the retainer clip hooks have worn out or the clips on the back of the keycap have snapped. Understanding this helps you diagnose the problem accurately before you start your repair.
Identifying Your Laptop Keyboard Mechanism Type
Not all laptop keyboards are the same. The type of mechanism your laptop uses will directly affect how you remove and replace the keycap. Getting this wrong can result in a snapped retainer clip or a damaged membrane.
The most common type found in modern laptops is the scissor switch mechanism. This uses a plastic clip shaped like crossed scissors or the letter X. Brands like Dell, HP, Lenovo, Acer, and ASUS have used this type for years. Scissor switch keys typically have a small amount of key travel and a satisfying click. They are also the most forgiving to work on because the clips are relatively durable.
The second type is the butterfly switch mechanism, which Apple used in MacBook keyboards from roughly 2015 to 2019. Butterfly switches have an extremely low profile and use a much more fragile clip system. These keys are notoriously difficult to replace because the clips break very easily. If you own a MacBook from this era, proceed with extra caution and consider professional help.
Apple later returned to a Magic Keyboard scissor mechanism in 2019, which is found in current MacBook Air and MacBook Pro models. This type is easier to work on than the butterfly design.
Some older laptops use a basic snap-in mechanism where the keycap simply clips directly onto two hooks on the keyboard base without a separate retainer clip. These are the easiest type to replace.
To identify your mechanism, you can search your laptop model number followed by “keyboard mechanism type” or “keycap replacement guide” online. You can also gently look at the underside of a key that has already come off to see what type of clip is attached.
Tools You Will Need for the Job
One of the best things about replacing a single laptop keycap is that you do not need a toolbox full of specialty equipment. Most of the tools you need are already in your home. Here is a clear breakdown of what to gather before you begin.
A plastic pry tool or spudger is the most important tool for safely removing the keycap. These are thin, flat plastic tools that can slide under the key without scratching the surface. They are often included in phone repair kits. If you do not have one, your fingernail works just as well for standard-sized keys. Do not use a metal screwdriver, knife, or metal card. Metal tools can slip and permanently scratch the keyboard surface or snap the fragile retainer clips.
A can of compressed air is useful for clearing out dust, crumbs, and debris from the area under the key before you reinstall the new one. Even small particles can prevent the key from sitting flat or registering properly.
A pair of tweezers can be helpful for picking up and positioning the small rubber cup during reinstallation. The rubber cup is tiny and easy to drop or misplace.
A magnifying glass or your phone camera is a great help for inspecting the retainer clip for damage. Cracks in these clips are small and easy to miss with the naked eye.
A soft microfiber cloth and a little isopropyl alcohol (70% is fine) can be used to clean the key area before installing the new keycap.
Finally, you will need the replacement keycap kit itself, which we cover in detail in the next section. Some people also keep a small dish or tray nearby to hold the tiny parts so they do not roll off the table.
How To Find and Order the Right Replacement Keycap
This step is critical. Keycaps are not universal. A keycap from one laptop brand will almost never fit a different brand, and even within the same brand, different models use different clip sizes and positions. Ordering the wrong keycap is the most common mistake people make.
The first thing you need to find is your exact laptop model number. Flip your laptop over and look at the sticker on the bottom. You will see a model name and a more specific model number, sometimes called a P/N (part number) or service tag. Write this down exactly as it appears.
For example, a Dell laptop might show “Inspiron 15 3511” while an HP might show “HP Pavilion 15-eg0xxx.” The year and revision matter because manufacturers often change keyboard hardware between production runs of the same model name.
Once you have the model number, you can search for replacement keycap kits using your model number. Most replacement kits include all three components: the keycap, the retainer clip, and the rubber cup. This is actually better than buying just the keycap alone because often the clip or rubber cup is also damaged even if it is not immediately visible.
Look for kits that specifically state compatibility with your exact model number. Most reputable repair parts sites let you search by model number and show you a picture of the keyboard layout so you can confirm the correct key shape before purchasing.
Space bar keys, Enter keys, Shift keys, and Backspace keys sometimes have metal stabilizer bars in addition to the standard clip. Make sure your replacement kit includes the stabilizer if your key uses one. Standard letter and number keys do not use stabilizer bars, so replacement is simpler for those.
Preparing Your Laptop Before You Start
Before touching a single key, you need to prepare your laptop properly. Skipping this preparation step can lead to accidental input, data loss, or even keyboard damage. It takes less than two minutes and is absolutely worth it.
Step 1: Save all your open work. Close your documents, save your files, and close any active applications. This ensures nothing gets corrupted if the keyboard accidentally sends inputs during the repair.
Step 2: Power off the laptop completely. Do not just close the lid or put it to sleep. Shut it down fully. This protects the keyboard membrane from receiving ghost signals and protects you from any minor electrical discharge.
Step 3: Unplug the charger. While a laptop keyboard repair does not involve any live circuits in the traditional sense, removing the power source is always good practice when working on any electronic component.
Step 4: Place the laptop on a clean, flat, well-lit surface. A wooden table with good overhead lighting is ideal. Avoid working on carpet because static electricity can build up and damage sensitive components. A clean surface also helps you see the tiny rubber cup if it falls out.
Step 5: Have your replacement kit and tools ready before you start. Lay everything out within arm’s reach so you do not have to scramble while holding a loose retainer clip in one hand.
Good preparation prevents 90% of the mistakes that happen during keycap replacement.
How To Safely Remove the Broken or Loose Keycap
Now comes the actual hands-on work. Removing a laptop keycap is simple once you know the correct technique. The key rule is: use gentle, even pressure and never force anything.
Start at the bottom corner of the key. Most laptop keycap retainer clips are hooked more firmly at the top of the key and release more easily from the bottom. Slide your plastic pry tool or fingernail under the bottom left corner of the keycap.
Apply gentle upward pressure while rocking the tool slightly. You should feel or hear a soft click as the first hook releases. Do not yank or pull quickly. Steady, gentle pressure is what you want.
Move to the bottom right corner and repeat the same gentle prying motion. Once both bottom corners are free, the top of the keycap will usually lift off easily with just a slight upward pull.
If the key resists, try the bottom right corner first instead of the bottom left. Some keys are clipped more strongly on one side depending on the brand and model.
Place the keycap somewhere safe the moment it comes free. A small dish or tray works perfectly. If the retainer clip comes off with the keycap, that is fine. You will handle it in the next step.
For larger keys like the space bar or Enter key, additional care is needed. These keys often have a metal stabilizer bar that runs horizontally under the key. Unhook one end of the stabilizer bar gently before lifting the keycap to avoid bending or breaking it.
Inspecting the Retainer Clip and Rubber Cup
With the keycap removed, take a moment to carefully examine everything underneath. This inspection step tells you exactly which parts need to be replaced and helps avoid a repeat repair in the future.
Look at the retainer clip first. This is the X-shaped or scissor-shaped plastic bracket sitting on the keyboard base. Check all four corners and plastic legs for cracks, chips, or missing pieces. A damaged retainer clip will cause the new keycap to sit unevenly or feel wobbly even after installation.
Tilt the clip at an angle under your light to see the small hook details more clearly. Cracks are sometimes very small and easy to miss if you only look straight down.
Check the rubber cup next. This is the tiny round rubber dome sitting in the center of the retainer clip area. It should be intact, round, and have no tears or flat spots. If the rubber cup is flattened, torn, or missing, the key will not spring back up after being pressed.
Look at the back of the removed keycap. The back of the keycap has four small plastic clips or hooks that attach to the retainer clip. If any of these are broken, snapped, or missing, the keycap needs to be replaced even if the visible front surface looks fine.
Check the keyboard membrane while you have clear access to it. Look for any visible damage, burns, or contamination. If there is a stain or spill residue, gently clean it with a cotton swab barely dampened with isopropyl alcohol and let it dry completely before proceeding.
If you find that the retainer clip is broken, do not try to glue it back together. Glue will interfere with the movement of the clip and make things worse. Use the replacement clip from your kit instead.
Installing a New Retainer Clip
If your retainer clip is damaged, installing the new one is the next step before you can put the keycap on. Installing the retainer clip correctly is the most technically precise part of the whole process, but it is still straightforward once you understand how it works.
The retainer clip has a specific orientation. It always needs to be installed so that it can travel up and down freely. If the clip is installed backward or upside down, it will not move and the key will not function.
Remove the old damaged clip by gently unhooked it from the four small metal or plastic tabs on the keyboard base. These tabs are typically at the four corners of where the key sits. Lift each corner of the clip gently until it releases.
Take the new retainer clip from your replacement kit and orient it correctly. The clip should sit flat on the keyboard base with the hinge opening facing upward. You can test this by gently pressing the top of the clip with your finger. It should move down smoothly and spring back up.
Snap each of the four corners of the new retainer clip onto the corresponding tabs on the keyboard base. Press each corner down with a little force until you feel or hear a click. Test all four corners to make sure they are secure.
Once all four corners are clipped in, test the movement again by pressing the top of the clip. It should move down smoothly and spring back without sticking. If it feels stiff or does not move, check that it is not installed backward. Flip it 180 degrees and try again.
Place the rubber cup in the center of the clip area. It should sit flat and perfectly cover the small contact point on the membrane. No adhesive is needed. The keycap will hold it in place once installed.
Placing and Snapping the New Keycap Into Position
With the retainer clip installed and the rubber cup in place, you are now ready to put the keycap on. This is the most satisfying step in the whole process, and when done correctly, it takes about 10 seconds.
Hold the new keycap with the printed side facing up, oriented in the correct direction (the same direction as all the other keys around it). Make sure the letter or symbol is right-side up and facing you.
Align the keycap over the retainer clip so the center of the keycap is directly over the rubber cup. The back of the keycap has four small clip hooks that need to align with the four attachment points on the retainer clip.
Press straight down on the center of the keycap with even, firm pressure. You should feel or hear two to four small clicks as the hooks snap onto the retainer clip. Do not press down on just one side or corner. Pressing from the center distributes the force evenly across all four hooks.
If the keycap sits slightly higher on one side, press gently on that side until you hear an additional click. All four corners should sit at the same height as the surrounding keys.
For large keys with a stabilizer bar, you need to insert the metal bar into its bracket first. Slide each end of the stabilizer bar into the small metal guides or brackets on either side of the key slot. Once the bar is in place, then align the keycap over the clip and press down.
Once installed, run your finger over the new key. It should feel level with the surrounding keys, spring back smoothly after being pressed, and not wobble side to side.
Testing the Replaced Key
After installation, you need to verify that the key works correctly before closing everything up. A key that looks good but does not register is still a broken key.
Power on your laptop and let it fully boot to the desktop or home screen.
Open a text editor, such as Notepad on Windows or TextEdit on Mac. A plain text editor is better than a browser address bar because it will show every character you type without auto-correcting or filtering input.
Press the replaced key several times at different speeds. Type it slowly once, then quickly several times in a row. Make sure the character appears on screen every single time you press the key. A key that only registers sometimes indicates that the rubber cup is not positioned correctly over the membrane contact.
Check the key’s behavior when pressed at different points across its surface. Press near the top edge, bottom edge, left side, and right side. A correctly installed keycap should register the keystroke no matter where on the key surface you press.
Test the key’s spring-back response. Press and hold the key, then release it. It should spring back up immediately and cleanly. A key that sticks down for a moment before returning means the retainer clip may be slightly misaligned or the rubber cup is not seated properly.
If the key does not register at all, power off the laptop, remove the keycap again, check that the rubber cup is perfectly centered, and reinstall. If it still does not work, the issue may be with the membrane layer beneath the key, which requires a different type of repair.
Common Mistakes To Avoid During Keycap Replacement
Even with good instructions, a few avoidable errors come up repeatedly. Knowing these mistakes in advance will save you time and potentially save your keyboard from further damage.
Using the wrong replacement key is the single most common problem. People search for a replacement keycap by key label (like “A key for HP laptop”) instead of by model number. Two HP laptops can look identical but use completely different clip systems. Always search by your specific model number.
Forcing the keycap on or off is another frequent mistake. Laptop keycap clips are made of thin plastic and they snap at a specific angle and force threshold. Yanking a keycap straight up instead of prying from the corner can snap the retainer clip hooks instantly. Always use the correct gentle prying technique from the bottom corner.
Installing the retainer clip backward is easy to do because the clip looks almost identical from both sides. The tell is simple: a correctly installed clip moves freely up and down. A backward clip feels stiff and does not travel. Always check movement before putting the keycap on.
Forgetting the rubber cup happens more often than you would think. The rubber cup is tiny and can easily roll off the table or get pushed aside during the repair. Without it, the key will press all the way down and not register properly. Check that it is in place before pressing the keycap down.
Using metal tools on plastic clips is a mistake that causes permanent damage. Even a flathead screwdriver used gently can slip and gouge the keyboard surface. Plastic pry tools cost almost nothing and prevent this entirely.
Not cleaning the area first is a smaller but still meaningful mistake. Dust and crumbs under the key can prevent the rubber cup from sitting flat and cause the key to feel crunchy or uneven after reinstallation.
When A Single Keycap Replacement Is Not Enough
Most of the time, replacing the keycap, retainer clip, and rubber cup solves the problem completely. But there are situations where a deeper issue exists and a keycap replacement alone will not fix it.
If the key does not register keystrokes after a correct replacement, the keyboard membrane layer underneath the key is likely damaged. The membrane is a thin flexible circuit layer that detects when a key is pressed. Liquid spills, physical impact, and age can damage specific contact points on the membrane. This type of damage requires a full keyboard replacement, not just a keycap fix.
If multiple keys in the same area of the keyboard have stopped working or feel different, this is another sign of membrane damage rather than individual keycap problems. A membrane failure often affects a column or row of keys because the circuit traces run in that pattern.
If your laptop sustained a liquid spill, the damage can range from just a stiff keycap (which is easy to fix) to corroded membrane contacts (which requires a full keyboard swap). Even if the key appears to work right after drying out, corrosion can develop over weeks and cause delayed failures.
If a key’s retainer clip tabs on the keyboard base itself are broken (the tiny metal hooks molded into the keyboard base plate), those cannot be replaced without replacing the entire keyboard. These tabs are part of the keyboard plate, not the removable clip. A skilled repair technician can sometimes use small adhesive-backed replacement tab brackets, but this is an advanced fix.
In all of these cases, the next step is a full keyboard replacement. On most modern laptops, this involves removing the bottom panel and disconnecting a ribbon cable. This is a more involved repair but is still DIY-friendly for many laptop models with the right guide for your specific machine.
Maintaining Your Laptop Keyboard To Prevent Future Keycap Damage
Replacing a broken keycap is satisfying, but preventing the problem in the first place is even better. A few simple habits can dramatically extend the life of every key on your keyboard.
Keep food and drinks away from your laptop. This is the single most effective prevention habit. Crumbs get lodged under keys and grind against the retainer clips every time you type. Liquid spills are the leading cause of membrane damage and keycap degradation. Even a small splash can cause corrosion that builds up over weeks.
Clean your keyboard regularly with compressed air. Every few weeks, hold the can of compressed air at a 45-degree angle and blow between and around the keys. This removes dust and crumbs before they can work their way under the keycaps and damage the clips.
Wipe your keycaps with a lightly dampened microfiber cloth. The natural oils from your fingers transfer to keycaps with every keystroke and create a layer of grime that, over time, makes the keycaps look dull and can make them slightly stickier. A weekly wipe-down with a dry or lightly damp cloth keeps them clean.
Do not use harsh cleaning products on your keycaps. Products with acetone, bleach, or strong solvents can dissolve the plastic or remove the printed labels from the keys permanently. Isopropyl alcohol at 70% concentration is the safest option.
Be mindful of how you pick up and carry your laptop. Grabbing a laptop by the screen or tilting it at extreme angles with the lid open can cause keys to pop off, especially on older keyboards where the clip hooks have softened slightly with age.
Use a keyboard cover if you frequently work in dusty environments or are prone to eating at your desk. Silicone keyboard covers slip over the keys and create a protective barrier without significantly affecting typing feel.
FAQs
Can I replace just one keycap on a laptop keyboard?
Yes, you can replace a single keycap on a laptop keyboard. You do not need to replace the entire keyboard. Most replacement keycap kits include the keycap, retainer clip, and rubber cup for the specific key you need. The process takes about 5 to 10 minutes for most standard keys.
Are laptop keycaps universal or model-specific?
Laptop keycaps are model-specific, not universal. The size, clip spacing, and hook positions vary between different laptop brands and even different models within the same brand. Always identify your exact laptop model number before ordering a replacement keycap to make sure it fits correctly.
What tools do I need to replace a laptop keycap?
You need a plastic pry tool or your fingernail, a can of compressed air, a pair of tweezers, and the replacement keycap kit. A magnifying glass is optional but helpful for inspecting small clips. Avoid using metal tools as they can snap the plastic retainer clips or scratch the keyboard surface.
Why does my key still not work after replacing the keycap?
If the key does not register after replacement, the problem is likely with the keyboard membrane layer beneath the key, not the keycap itself. Check that the rubber cup is correctly centered over the contact point. If the rubber cup is in place and the key still does not register, the membrane may be damaged and a full keyboard replacement will be needed.
How do I remove a keycap without a pry tool?
You can use your fingernail to remove a keycap without a pry tool. Slide your fingernail under the bottom left corner of the key and apply gentle upward pressure until you hear a soft click. Avoid using metal objects like coins or knives as they can permanently damage the keyboard and snap the retainer clip.
Can a broken retainer clip be repaired with glue?
Gluing a broken retainer clip is not recommended. Glue will interfere with the movement of the clip and prevent the key from traveling up and down correctly. The best solution is to replace the retainer clip entirely. Replacement kits that include all three key components (keycap, clip, and rubber cup) are widely available and inexpensive.
How do I find the right replacement keycap for my laptop?
Find your laptop’s exact model number by flipping it over and reading the sticker on the bottom, or by checking System Information in your operating system settings. Use that model number to search for a compatible replacement keycap kit. Always confirm compatibility by checking that the product description or site search specifically lists your model number as supported.
Is replacing a keycap on a MacBook the same as on a Windows laptop?
The process is similar but not identical. MacBooks from 2015 to 2019 used a butterfly switch mechanism, which is more fragile than the scissor switch used on most Windows laptops. Current MacBook Air and Pro models use a scissor mechanism that is more similar to Windows laptops. For butterfly switch MacBooks, extra care is needed because the clips break very easily.
Hi, I’m Yuri — I’m a tech enthusiast who loves breaking down complex gadgets, software, and tools into simple, honest reviews and guides. My goal? To help you spend less time researching and more time enjoying the right tech.